
Disclosure: VPNFin is reader-supported. If you buy a VPN through links on this page, we may earn a commission at no extra cost to you. This never affects our ratings — here’s our full disclosure.
Setting up NordVPN on Mac starts with a choice most other devices do not ask you to make. NordVPN publishes two macOS apps: one in the Mac App Store and one downloaded from its own website. Its support page describes the App Store version as simpler to install, with a kill switch that blocks all internet access if the connection drops. The website version is the one with more controls.
Picking the right one decides which features you get, and switching later means uninstalling. This guide explains the difference, walks through setup, and covers what tends to break.
NordVPN on Mac: The Short Answer
Choose the website version if you want every control: guides comparing the two list Threat Protection Pro, custom DNS and a per-app kill switch as extras over the App Store build. Our NordVPN review explains those features.
Choose the App Store version if you want simplicity, automatic updates through macOS and a kill switch that cuts the whole connection. It needs macOS 11 Big Sur or later. For a whole home, our router guide covers protecting every device at once.
Both include the core: NordLynx, Double VPN, Meshnet and Onion Over VPN servers, NordVPN’s support page confirms. Our Mac VPN guide compares NordVPN with other providers.
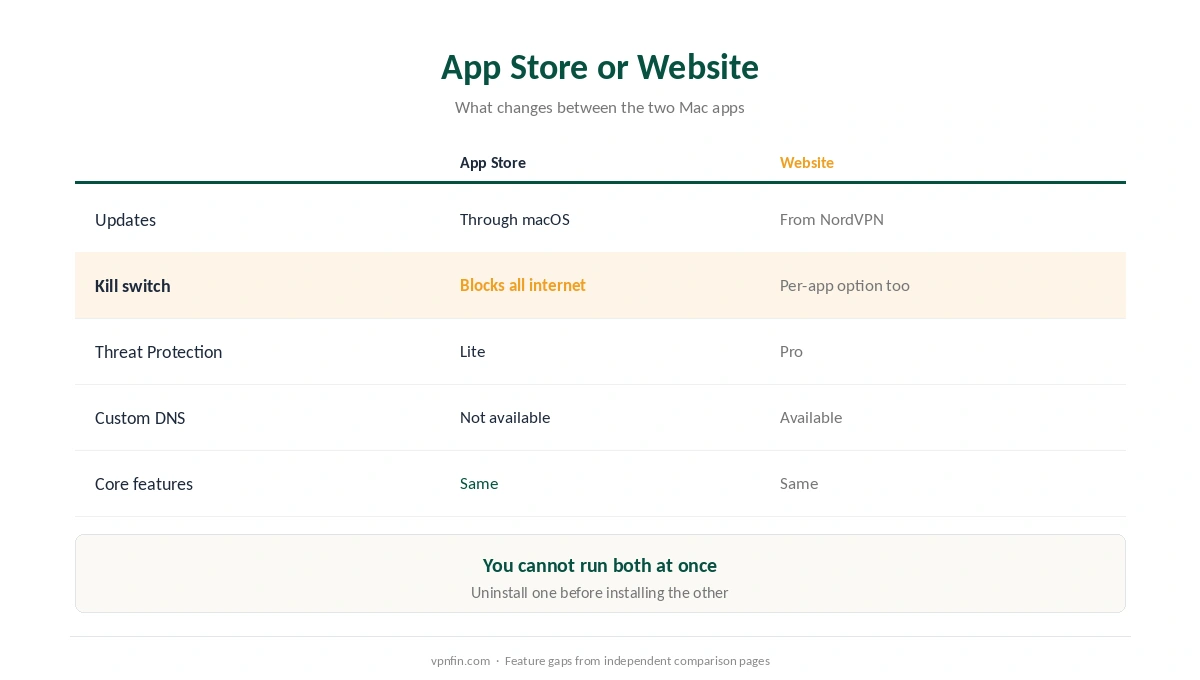
App Store or Website: The Difference
| App Store version | Website version | |
|---|---|---|
| Install and updates | Through macOS, automatic | From NordVPN’s site |
| Kill switch | Blocks all internet | Per-app option as well |
| Threat Protection | Lite | Pro |
| Custom DNS | Not available | Available |
| Core features | NordLynx, Double VPN, Meshnet, Onion Over VPN | The same |
The core comes from NordVPN; the extras come from comparison guides. NordVPN’s support page confirms the shared core and the App Store kill switch. The feature gaps in the table come from independent comparison pages published on GitHub, so treat them as a guide and check the app’s settings after installing.
You cannot run both. To switch, quit and uninstall the one you have, then install the other and sign in again. If you only want Safari’s traffic hidden, our guide to what a VPN hides explains how a full VPN differs.
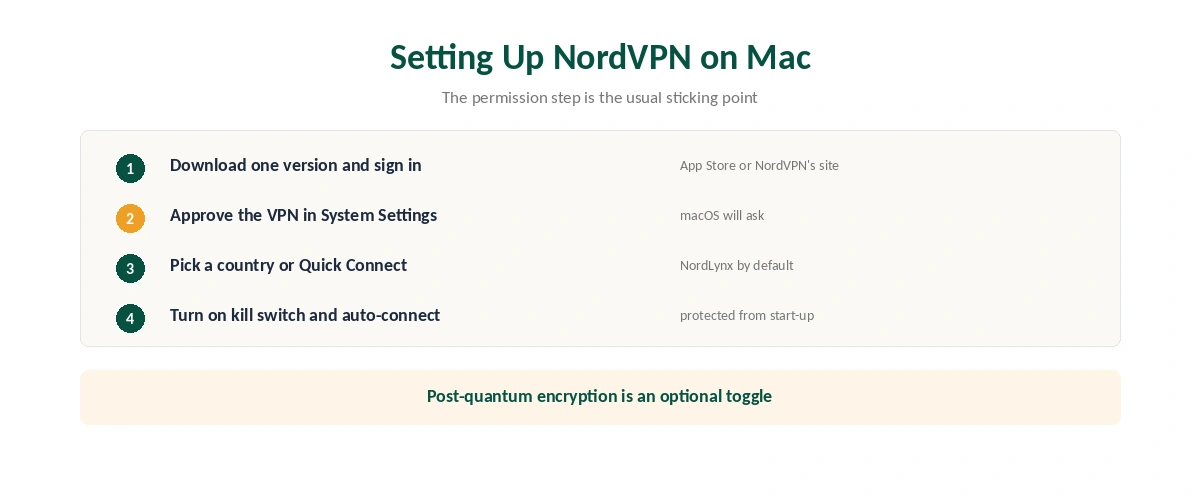
Setting Up NordVPN on Mac
| Step | What to do | Note |
|---|---|---|
| 1 | Download from the App Store or NordVPN’s site | Choose once; switching means reinstalling |
| 2 | Open the app and sign in | Browser sign-in opens automatically |
| 3 | Allow the VPN configuration or system extension | macOS asks in System Settings |
| 4 | Pick a country or Quick Connect | NordLynx by default |
| 5 | Turn on the kill switch | Under the app’s settings |
| 6 | Turn on auto-connect | So the Mac is protected from start-up |
The permission step is a common sticking point. macOS will not let the VPN start until you approve it in System Settings; if nothing happens after you click Connect, look there first.
Post-quantum encryption is a toggle in the general settings, and optional. Once connected, confirm the new address with our guide to checking a VPN. Our kill switch guide explains the difference between system-wide and per-app kill switches.
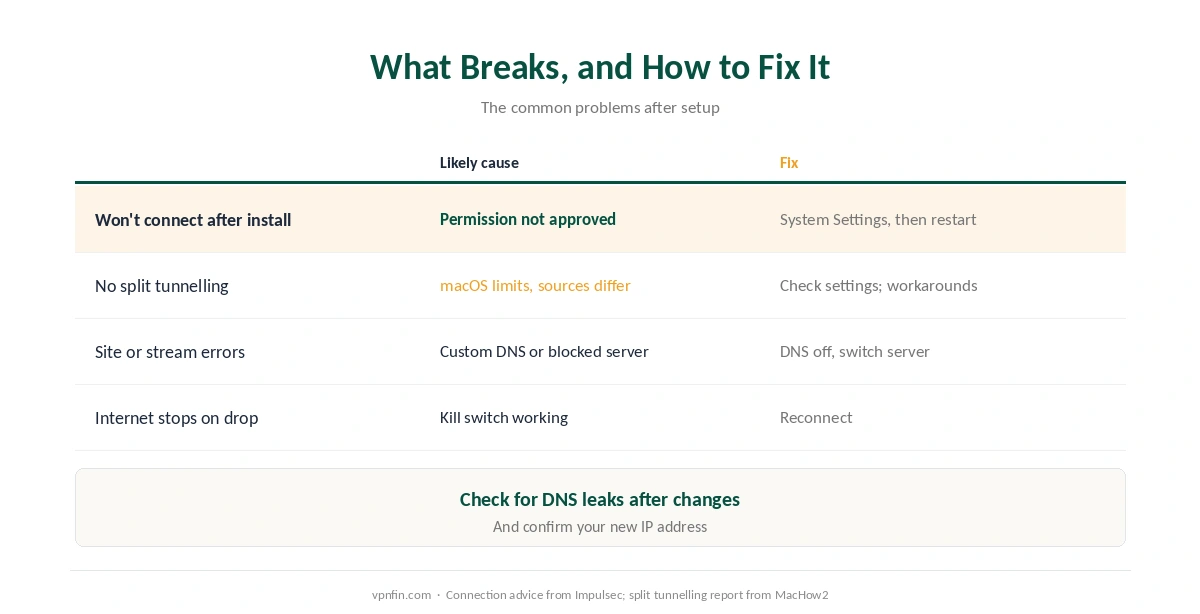
What Breaks, and How to Fix It
The VPN will not connect after installing. Approve the VPN configuration or system extension in System Settings, then restart the Mac, Impulsec suggests. If a firewall asks, allow NordVPN.
Split tunnelling is missing. Sources disagree here. NordVPN’s own split tunnelling instructions cover macOS, while MacHow2 reported in June 2026 that NordVPN offers no native split tunnelling on modern macOS, because of Apple’s network restrictions. Check your app’s settings; our split tunnelling guide covers workarounds.
A website or streaming service misbehaves. If you set a custom DNS in the website version, turn it off, and check for leaks with our DNS leak guide. Otherwise switch server and reload the page. Our Netflix guide explains server blocks.
The internet stops when the VPN drops. That is the kill switch working. Reconnect, or turn it off briefly if you need access, then turn it back on. Our troubleshooting guide covers the other causes.
Turning It Off
Disconnect from the menu bar icon or the app, and turn off auto-connect if you want the Mac to start without it. Our guide to turning off a VPN on Mac covers every method. On an iPhone, see our NordVPN on iPhone guide.
How We Research
The two app versions and the shared core come from NordVPN’s support page on its macOS applications. The feature comparison comes from independent GitHub comparison pages, the macOS requirement and connection advice from Impulsec, and the split tunnelling report from MacHow2. We name each source where used; all were read on 26 September 2026. We did not test on a Mac ourselves. Our full approach lives on the About Us page.
NordVPN on Mac FAQ
The website version if you want every control, such as custom DNS and a per-app kill switch. The App Store version if you prefer simple installation and automatic updates.
For the App Store version, macOS 11 Big Sur or later. Older Macs should use the version from NordVPN’s website.
Sources disagree. NordVPN’s instructions include macOS, but MacHow2 reported in June 2026 that native split tunnelling is unavailable on modern macOS. Check your app’s settings.
macOS needs you to approve the VPN configuration or system extension in System Settings. Approve it, then restart the Mac if needed.
No. Uninstall one before installing the other, then sign in again.
The Verdict
NordVPN on Mac comes in two versions, and the choice matters more than the setup. The website version gives you more controls; the App Store version is simpler.
Once installed, approve the system permission, turn on the kill switch and auto-connect, and most problems after that have a quick fix.