
Disclosure: VPNFin is reader-supported. If you buy a VPN through links on this page, we may earn a commission at no extra cost to you. This never affects our ratings — here’s our full disclosure.
CyberGhost on Raspberry Pi means a manual OpenVPN setup. CyberGhost has no dedicated app for Raspberry Pi OS, as Parrainduweb and Acciyo note, so you use the standard OpenVPN client with CyberGhost’s configuration files. The key detail is the credentials: NAT Checker stresses that manual setups use a generated username and password, not your account login.
This guide covers the setup, starting the tunnel at boot, keeping SSH access, and when another provider’s Pi support may suit you better.
What You Need
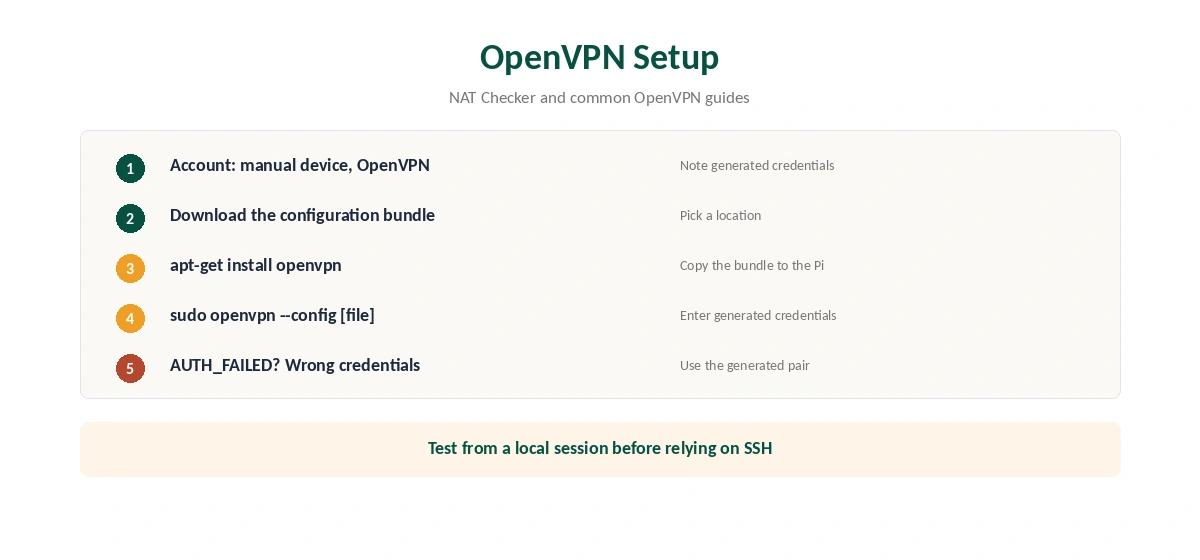
A Raspberry Pi running Raspberry Pi OS or another Debian-based system, network access, and a terminal, either on the Pi or over SSH. In your CyberGhost account, create a manual device and choose OpenVPN, as our CyberGhost OpenVPN guide explains.
Note the generated username and password, and download the configuration bundle for the location you want. NAT Checker says it contains the CA, client certificate and private key alongside the .ovpn file.
CyberGhost on Raspberry Pi OpenVPN Setup
Update the Pi and install the OpenVPN client with apt-get install openvpn. Copy the configuration bundle to the Pi and keep all its files in one folder, since the .ovpn file refers to the certificates beside it.
Start the tunnel with sudo openvpn –config followed by the .ovpn file’s name. Enter the generated username and password when asked. If you see an authentication failure, you used your account login; switch to the generated credentials.
Saving Credentials and Starting at Boot
To avoid typing the credentials each time, many OpenVPN guides store them in a text file and point the configuration’s auth-user-pass line at it, as VPNUK’s Raspberry Pi guide shows. Keep that file readable only by root, since it holds your VPN password.
For a tunnel that starts at boot, a common approach, used in PiMyLifeUp’s guides, is to copy the configuration into /etc/openvpn with a .conf name so the OpenVPN service picks it up. Test a reboot while you can still reach the Pi locally.
Keeping SSH Access
If you manage the Pi over SSH, test the tunnel from a local session first. Bringing up a VPN can change routing and cut the SSH connection you are using. Keep a keyboard and screen nearby, or another way in, until the setup proves stable.
Disabling IPv6 by Hand
A manual OpenVPN setup does not switch IPv6 off, unlike CyberGhost’s Linux app. On networks that use IPv6, traffic can leave outside the tunnel. Our IPv6 leak guide explains how to check and disable it, and our DNS leak guide covers the DNS side.
Keeping the Configuration Current
NAT Checker notes that a changed manual password or a stale saved profile causes repeated password prompts and authentication failures. If you regenerate credentials in the CyberGhost account, update the Pi’s credentials file. If a server stops responding, download a fresh bundle for the same location rather than editing the old file.
Choosing a Location
Each configuration bundle points to one location. Download two or three for nearby countries, so you can switch if one server is busy. Distance adds delay, and a Pi’s modest processor makes every extra millisecond more noticeable. Name the files clearly so you know which is which from the terminal.
Speed on a Pi
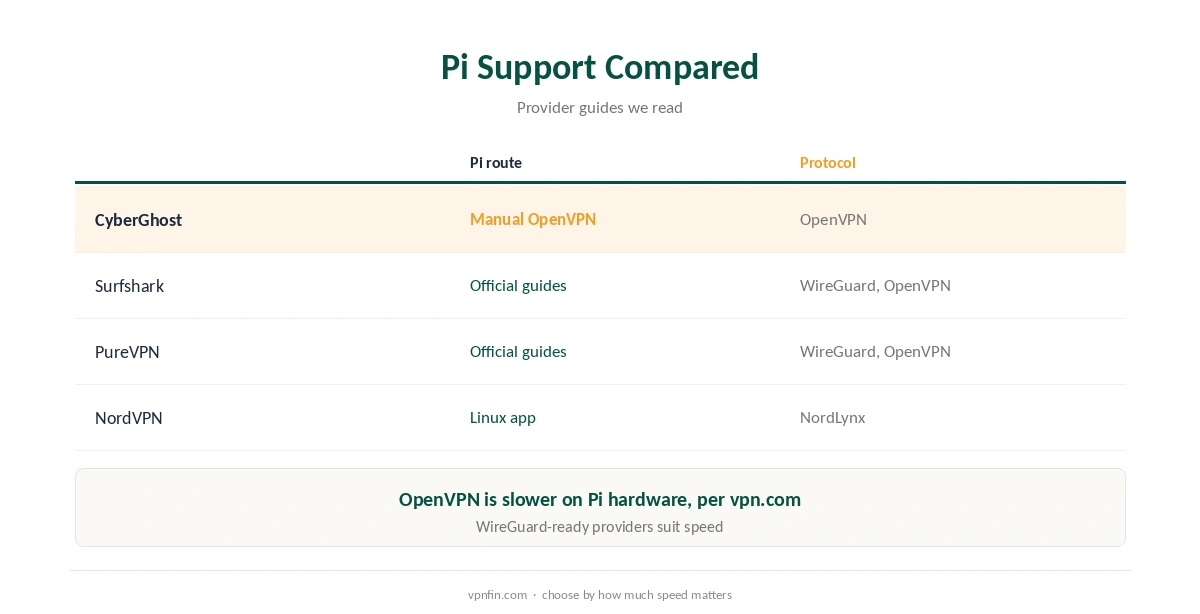
OpenVPN asks more of the Pi’s processor than WireGuard. Vpn.com measured OpenVPN at 5 to 15 Mbps on an original Pi 1, against 15 to 20 Mbps for WireGuard. Newer boards do much better, but OpenVPN remains the slower protocol.
If speed matters, consider a provider that documents WireGuard for the Pi. Our Surfshark Raspberry Pi guide and PureVPN Raspberry Pi guide cover two.
Client or Server?
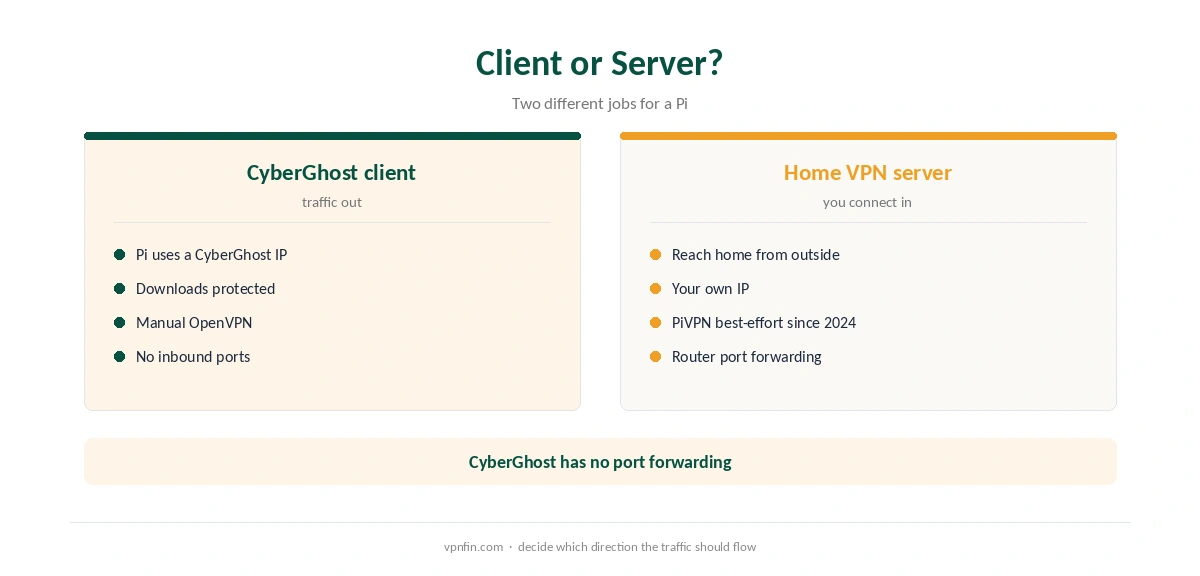
This setup makes the Pi a VPN client: its traffic leaves through CyberGhost. A home VPN server is a different job, letting you reach home from outside, as our Raspberry Pi VPN server guide explains. CyberGhost does not offer port forwarding, so a Pi behind it cannot accept connections from outside.
What CyberGhost Costs
CyberGhost renews at $56.94 a year on its 2-year plan, according to our renewal table. It covers seven devices, and a Raspberry Pi takes one of them. The 45-day money-back guarantee applies to website purchases, as our CyberGhost refund guide explains.
| Provider | Renewal price | Per month | Tier |
|---|---|---|---|
| NordVPN | $139.08/yr | ~$11.59 | Basic |
| Surfshark | ~$79/yr | ~$6.58 | Starter |
| ExpressVPN | $99.95/yr | ~$8.33 | Basic |
| CyberGhost | $56.94/yr | ~$4.75 | 2-year |
| PureVPN | $47.95/yr | ~$4.00 | Standard, 2-year (1-year renews $57.95) |
| IPVanish | $89.99/yr | ~$7.50 | Essential |
| Windscribe | ~$69/yr | ~$5.75 | Pro |
| Proton VPN | ~$83.88/yr | ~$6.99 | VPN Plus |
| Mullvad | ~$65/yr | ~$5.40 | flat, no tiers |
| Norton VPN | $79.99/yr | ~$6.67 | Standard |
| Hotspot Shield | ~$95.99/yr | ~$8.00 | Premium annual |
| Astrill | $300 every 2 yrs | ~$12.50 | 2-year, same at renewal |
Testing and Related Guides
After connecting, check the Pi’s public IP with a command-line request to an IP service, and compare it with our VPN test page. A manual tunnel has no app kill switch, as our kill switch guide explains.
Our Raspberry Pi VPN guide compares providers, and our CyberGhost Linux guide covers the desktop app. For plan details, see our CyberGhost price guide. CyberGhost belongs to Kape Technologies, which also owns ExpressVPN and Private Internet Access.
How We Research
This page draws on NAT Checker’s CyberGhost OpenVPN guide, Parrainduweb and Acciyo on CyberGhost and the Pi, OpenVPN client guides from VPNUK and PiMyLifeUp, vpn.com’s Pi tests and our renewal table. We cross-checked these sources against each other, and where they conflict or something can’t be verified, we say so in the text rather than guessing. We checked time-sensitive figures, including prices in US dollars, on 6 October 2026. Renewal from our renewal table. The main source we relied on is NAT Checker’s CyberGhost OpenVPN guide. Our full approach lives on the About Us page.
CyberGhost on Raspberry Pi FAQ
No. Use the standard OpenVPN client with CyberGhost’s configuration files.
The generated manual username and password, not your account login, NAT Checker notes.
Copy the configuration into /etc/openvpn with a .conf name, as common OpenVPN guides do.
It is slower than WireGuard; vpn.com measured 5 to 15 Mbps on a Pi 1.
No. CyberGhost has no port forwarding.
The Verdict
CyberGhost on Raspberry Pi works through manual OpenVPN with generated credentials. Keep the bundle’s files together, protect SSH access, and consider a WireGuard-ready provider if speed matters most.